 NeoBit Daily
Introduction to LumaFusion 2026 for Pro Mobile Editing
LumaFusion 2026 stands out as a leading professional video editing app for iOS devices, empowering creators to produce high-quality content directly on iPad and iPhone. This tutorial covers everything from initial setup to advanced workflows, including a sample vlog project that demonstrates real-world application.
Whether you're editing travel vlogs or corporate videos, the app's intuitive interface combined with powerful tools makes it ideal for mobile professionals. Apple's iOS ecosystem provides seamless hardware integration that enhances performance.
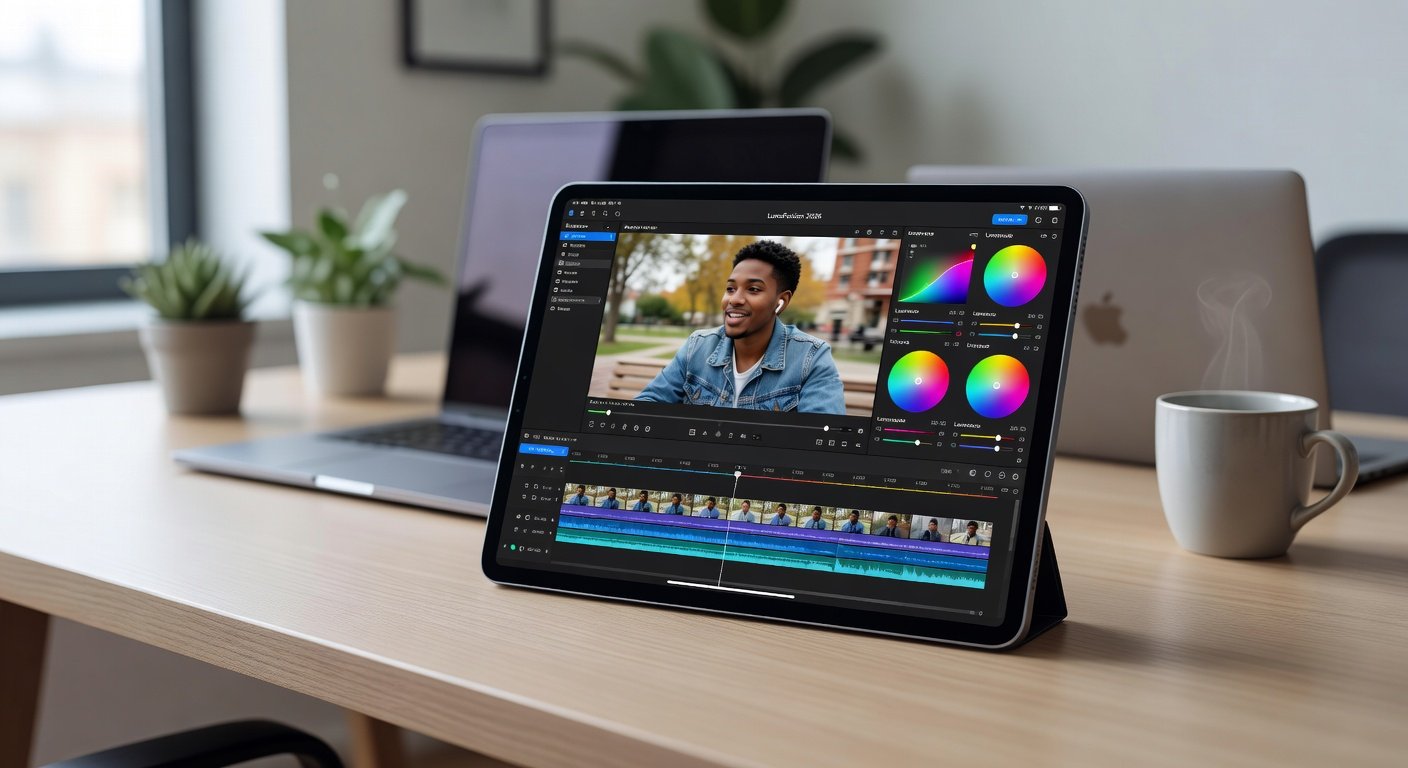
Getting Started: Setup and Interface Overview
Begin by downloading LumaFusion from the App Store. Upon launch, create a new project by selecting the plus icon and naming it, such as "Vlog2026". The interface features a media browser at the bottom, a preview window, and the timeline above.
Customize your workspace by dragging panels for optimal viewing. Enable Apple Pencil support in settings for precise timeline navigation and annotations.
Importing Footage and Organizing Media
Import clips via the media browser by connecting your camera or using iCloud. Organize footage into bins for easy access. For a sample vlog, import 4K clips of talking-head shots and B-roll.
Supported formats include ProRes and H.264, ensuring compatibility with high-resolution sources.
Timeline Navigation, Cuts, and Transitions
Navigate the timeline with pinch-to-zoom gestures or Apple Pencil taps. Make precise cuts using the razor tool, then drag to rearrange. Add transitions like dissolves by dragging from the effects library onto clip edges.
Adjust transition duration by tapping and entering values for smooth flow in your vlog sequence.
Speed Adjustments and Effects Layering
Apply speed ramps by selecting a clip and adjusting the speed slider. For dramatic effects, slow down key moments to 50% while speeding intros to 150%.
Layer effects such as blurs or overlays using the effects panel. Stack multiple layers for complex compositions without performance lag on modern iPads.
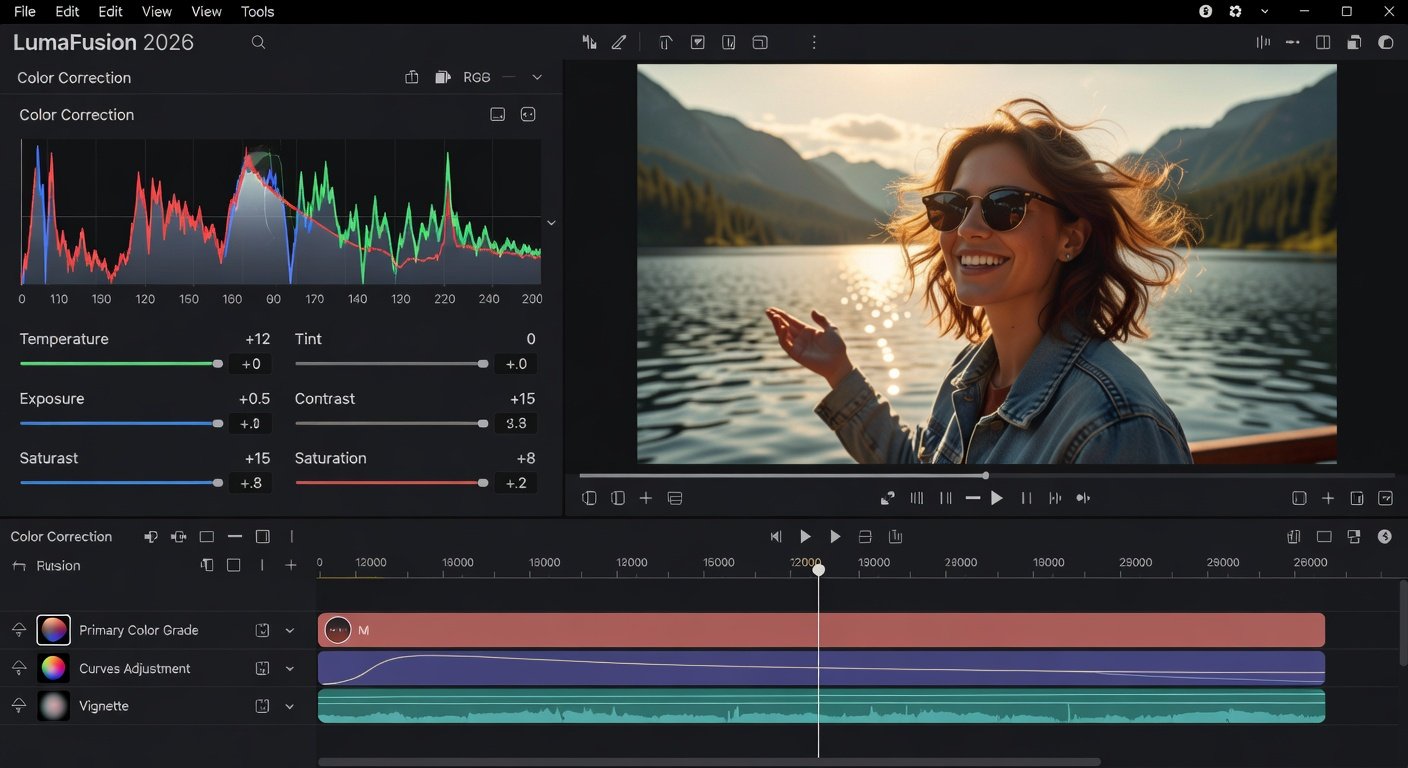
Color Correction and Audio Syncing
Use the built-in color tools for correction: adjust exposure, contrast, and saturation via curves and wheels. Match shots by copying LUTs across clips.
For audio, import separate tracks and sync automatically using waveform alignment. Fine-tune with volume keyframes to balance voiceover and music.
4K Exports and Workflow Optimizations
Export in 4K by selecting project settings and choosing H.265 codec for smaller file sizes. Optimize workflow by using keyboard shortcuts and saving templates for repeated vlog edits.
Plugin extensions from the official store add features like advanced stabilization.
LumaFusion vs CapCut: Pro Features Compared
While CapCut suits beginners with its free templates and social media focus, LumaFusion excels in pro capabilities like multi-track timelines, advanced color grading, and plugin support. Beginners may start with CapCut for quick edits, but professionals prefer LumaFusion for precise control and export quality.
Sample Vlog Edit Walkthrough
Follow these steps for a 60-second vlog: Import clips, cut intro to 10 seconds, add transition, correct colors on main shot, sync narration, layer text effects, and export at 4K 30fps.
Frequently Asked Questions
- How to fix crashes? Update to the latest version and clear cache in settings.
- Why long rendering times? Reduce timeline complexity or export in lower resolution first for previews.
- Apple Pencil tips? Use for frame-accurate scrubbing and mask drawing.
Conclusion
With these techniques, LumaFusion 2026 transforms your iOS device into a pro editing suite. Practice the sample project to build skills quickly and elevate your mobile video content.
No comments yet. Be the first!