 NeoBit Daily
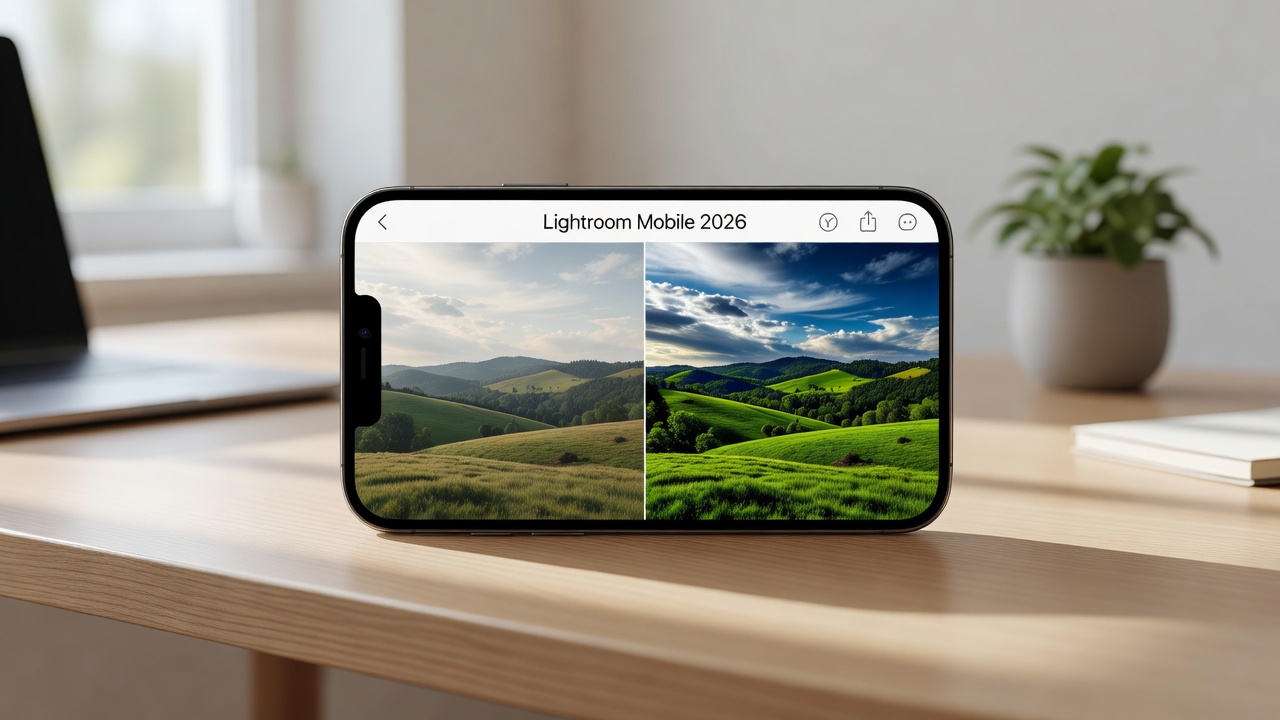
Introduction to Lightroom Mobile in 2026
Adobe Lightroom Mobile remains the go-to app for photographers seeking professional edits on smartphones and tablets. In 2026, the app continues to evolve with refined AI tools and seamless cloud integration, making it ideal for beginners who want fast, high-quality results without a desktop computer. This guide walks you through everything from importing your first photos to advanced masking techniques and batch processing, helping you achieve polished images on the go.
Whether you shoot with an iPhone or Android device, Lightroom Mobile offers intuitive controls that bridge the gap between casual snaps and stunning visuals. Beginners often struggle with overwhelming sliders and menus, but breaking the workflow into clear steps removes the guesswork. The app supports both JPEG and RAW formats, allowing you to capture maximum detail straight from your phone camera. With regular updates throughout 2026, features like improved generative AI and faster syncing have made mobile editing more powerful than ever.
Getting Started: Importing Photos
Begin by downloading the free Lightroom Mobile app from your device's app store and signing in with an Adobe ID. The import process is straightforward: tap the plus icon in the Library module, then choose photos from your camera roll, files, or connected cloud services. For efficiency, enable automatic import from your camera folder so new shots appear instantly. You can also connect external storage via USB-C or Lightning adapters on supported devices.
Organize imports by creating collections right away. Tap the folder icon to build albums such as "Travel 2026" or "Portraits." This simple habit prevents cluttered libraries later. Always shoot in RAW + JPEG when possible for maximum editing flexibility. If your device supports it, enable the Camera Roll sync option to pull in new images automatically every time you open the app. Common import issues include slow loading on large batches; solve this by importing in smaller groups of 20-30 photos at a time.
Understanding the Lightroom Mobile Interface
The bottom navigation bar gives quick access to Library, Edit, Presets, and Profile sections. In Library view, swipe between grid and list modes. Long-press any thumbnail to enter multi-select mode for bulk actions. The Edit module displays a large preview with collapsible panels for Light, Color, Effects, Detail, and Optics. Use two-finger gestures to zoom and pan while making adjustments. The undo button at the top allows stepping back through changes, and the compare view helps evaluate edits against the original.
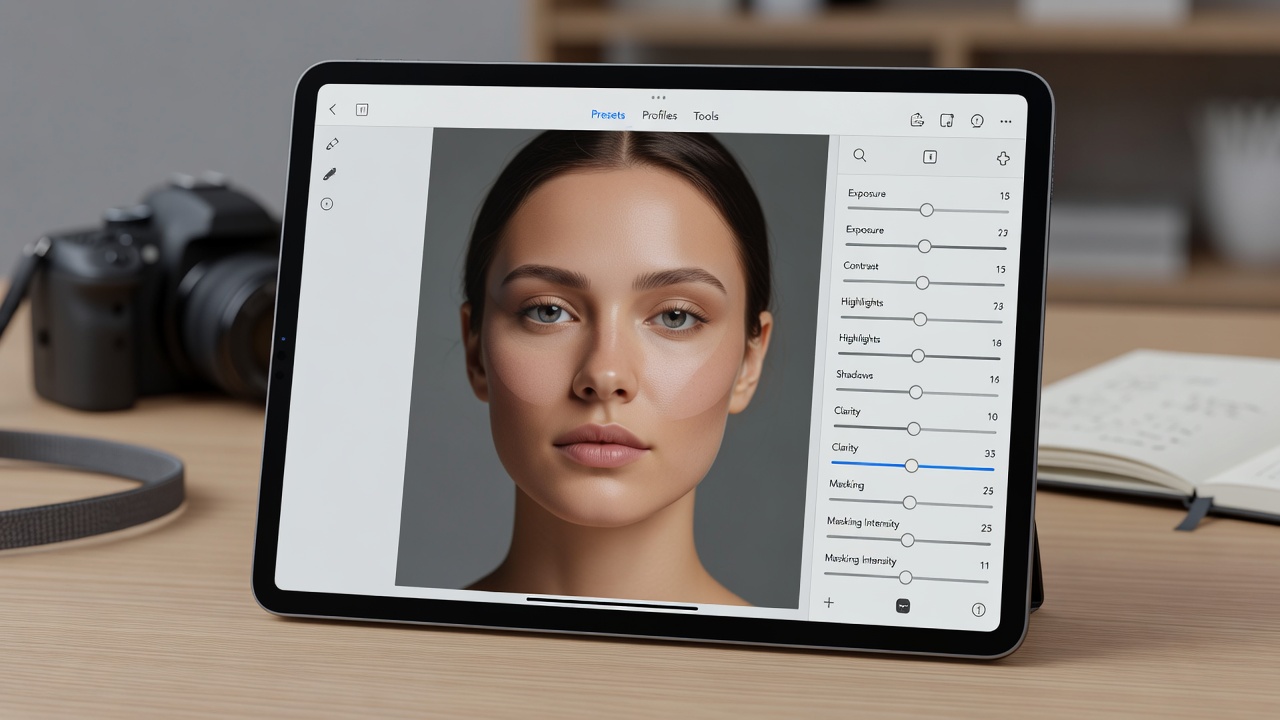
Core Editing Sliders Explained
Once your photo is open in the Edit module, you'll see the main adjustment panel. Start with the Light section: Exposure controls overall brightness, while Contrast adds definition. Highlights and Shadows recover detail in bright or dark areas, and Whites/Blacks set the tonal extremes. For example, on an overexposed beach photo, lower Highlights to -45 and raise Shadows to +30 for balanced exposure.
Move to Color for Vibrance and Saturation tweaks, then Detail for sharpening and noise reduction. Texture and Clarity sliders enhance mid-tone definition without harsh edges. Experiment with one slider at a time while zooming in to check pixel-level changes. A practical tip: use the Auto button first as a baseline, then refine manually. Compare your edits against the original by long-pressing the image preview. Always check the histogram at the top to avoid clipping highlights or shadows.
Applying and Creating Presets
Presets deliver one-tap style transformations. Browse the Presets tab for categories like Cinematic, Vintage, or B&W. Tap any preset to apply it, then adjust intensity with the slider below. Save custom looks by tweaking sliders and tapping the three-dot menu to create a new preset. You can also download community presets directly within the app by searching the Discover section.
Organize presets into groups for quick access during shoots. Many users build signature styles for consistent social media feeds. To apply a preset across multiple images, select them in Library view and use the Sync feature. This ensures stylistic consistency without repetitive manual work.
Library Organization Best Practices
Keep your library manageable with ratings, flags, and keywords. Star your best shots, then filter by rating in the Library view. Add keywords such as "beach" or "sunset" during import for fast searches. Use the search bar to locate images by date, location, or camera model. Create smart albums that automatically group photos based on criteria like rating or capture date.
Sync across devices by enabling cloud storage. This ensures edits made on your phone appear on your tablet instantly. For large libraries, regularly archive older collections to keep performance smooth. Use color labels to mark photos for different projects or clients.
Step-by-Step Masking Techniques
Masking lets you edit specific areas without affecting the whole image. In 2026, Lightroom Mobile includes improved AI subject selection. Tap the Masking icon, choose Subject or Sky, and refine the selection with the brush tool. Adjust exposure or color only on the masked region for natural results. Additional options include Linear Gradient for skies and Radial Gradient for spotlight effects.
For example, brighten a subject's face while keeping the background moody. Practice on portraits first to master edge detection. Combine multiple masks by adding new layers and intersecting them with the subtract tool. Always feather the edges slightly for seamless blending.
Batch Processing Examples
Batch editing saves hours when handling similar photos. Select multiple images in the Library, tap the three-dot menu, and choose Edit. Apply the same preset or adjustments to the entire group. Lightroom copies the settings while preserving individual exposure differences when using Sync. For a wedding shoot with 50 similar reception photos, apply a warm tone preset and slight clarity boost in one batch action.
Try this workflow on a series of landscape shots taken under consistent lighting. Export the batch directly to your camera roll or cloud folder in one action. Review the synced results by switching to the Before/After view on any selected image.
Free vs Paid Features Comparison
The free version provides core editing tools, limited cloud storage, and basic presets. The paid Lightroom plan unlocks full cloud sync, advanced masking, Denoise AI, and unlimited storage. Beginners can achieve excellent results with the free tier before upgrading for heavier workflows. Paid users also gain access to priority support and exclusive preset packs released in 2026 updates.
Before-and-After Case Study
Consider a dull smartphone landscape taken at midday. After import, apply a warm preset, lift shadows by +40, reduce highlights by -30, and add a linear gradient mask to the sky. Increase clarity to +25 and sharpen details. The final image shows vibrant colors and balanced exposure, transforming a flat photo into a share-worthy result that looks professional on social platforms.
Exporting and Common Issues
When ready to share, tap the share icon and select JPEG or original format. Choose resolution based on your platform—full size for prints, reduced for social media. If exports appear pixelated, check that the original file was high-resolution and avoid aggressive compression. Enable the export queue to handle multiple files in the background.
FAQ
- Why won't my photos export? Ensure sufficient storage space and stable internet for cloud-synced files. Restart the app or device if the queue stalls.
- How do I improve app performance? Close background apps, clear the cache in settings, and keep the app updated. Lower preview quality in preferences for older devices.
- Can I edit offline? Yes, but sync requires a connection. Edits made offline upload automatically once online.
- What file formats are best for export? Use JPEG for quick sharing and TIFF for high-quality prints. Always keep originals in the cloud for future edits.
- How do I fix slow AI masking? Ensure your device has at least 4GB of RAM and a recent operating system update. Process masks on fewer images at once.
For official documentation and updates, visit Adobe's official site. Explore additional mobile photography resources at National Geographic and camera technique guides from DPReview.
Conclusion
Lightroom Mobile 2026 empowers beginners to produce professional results quickly. Follow the structured workflow above—import, edit, mask, organize, and export—to build confidence and consistency. Practice daily with one photo to internalize the tools, and soon mobile editing will feel second nature. Experiment with different photo genres to discover your favorite techniques and grow your skills over time.
No comments yet. Be the first!